Cob Oven Construction
The Creation of a Pizza Monster!
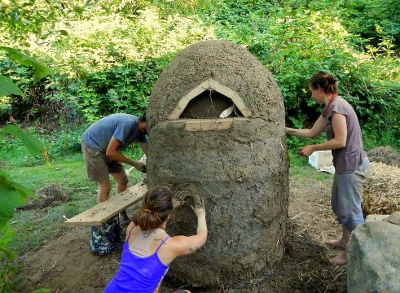
A cob oven is becoming a key element on any property whose residents are practicing permaculture. The reason for this is that earthen ovens perform many functions, including:
- Eco-friendly cooking
- Support outdoor dining
- Aesthetic appeal
- Give reason to throw a pizza party (a.k.a. build community)
- Provide inspiration for further natural building projects
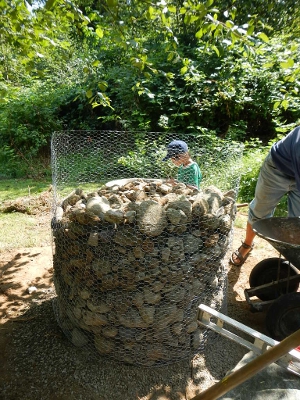
Building the oven itself is quite easy. The difficult part is deciding what to use for the foundation. As we all know, foundations are essential for any building. We had just completed our root cellar and had a bunch of extra small to medium sized stones lying in a pile. We also had extra chicken wire from the earthbag cellar project.
I know that a light bulb just turned on in your head. Put the stones in the chicken wire and tamp them down! That is indeed what we did. We were able to make a three and a half foot diameter cylinder of stones that was about four feet tall. There was still a little more than a wine bottle’s length of chicken wire extending beyond the stones.
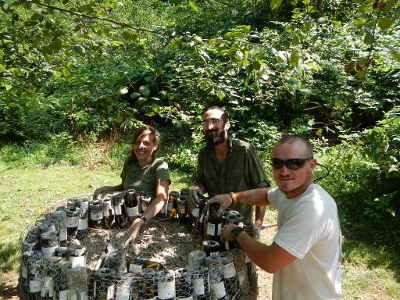
The next step of our cob oven construction was to make an
insulated base. What we did was lay down
about a three inch thick layer of straw, then mix up some slip straw type stuff
with perlite. After that, we started
inserting empty wine bottles upside down and backfilling between them with
perlite. When the circle was packed full
of about 80 wine bottles, we put another thin slip layer on top and leveled
it.
Fire bricks were placed atop that last layer in a way that maximized oven floor space. We also made sure all the bricks were on the same vertical plane (easier to slide the big pizza spatula in and out!).
The “oven” part of a cob oven is just a void. The strongest voids on this earth are domes. The interior of our cob oven is a dome. We used sand to make a form for the dome. A string tied to a pencil made a great compass for drawing a perfect circle from the exact center of the brick floor. The height of our form was about 70% of the diameter of the form.
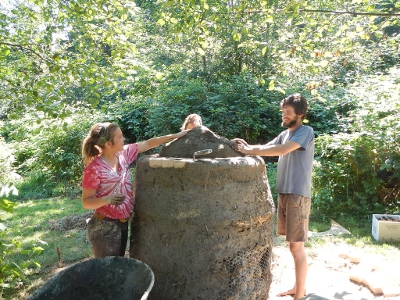
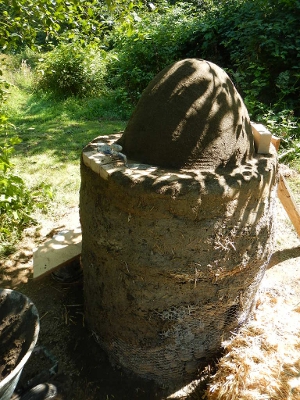
Strips of wetted newspaper were placed around the form as a separation layer between the form and the actual oven. This step was followed by the mixing and application of a thermal layer (which is a mix of coarse sand, sifted 5/8” gravel, and clay). This layer was about 3 inches thick and applied directly around the form. The second layer has a lot more coarse sand than gravel and also has chopped straw in the mix. This is the closest to regular cob that we got. This second layer was added in “cobs,” which look like loaves of mud.
Be More Prepared For Your Next Outdoor Adventure!
Don't leave without knowing these six essential survival skills. Our free survival mini guide reveals the strategies of:
- Shelter & fire to prevent the number one cause of death
- Obtaining clean water to avoid life-threatening dehydration
- Common wild survival foods and other critical skills!

The plastering step is when the pizza monster was
created. We plastered the cob oven this
summer during our Permaculture Design Course. To make an earthen plaster one needs a few
different materials and tools:
- Clay (we have a clay bank on site)
- Sand (fine beach sand is good for plastering)
- Finely chopped straw (weed whacked loose straw in a 55 gallon drum for about 10 minutes)
- Ungulate manure (optional)
- 1/4 inch screen
- 1/8 inch screen
- Mixing tools (hands, hoes, shovels)
- Container to hold plaster (bucket, wheelbarrow, etc.)
- Throwing device (trowels, hands)
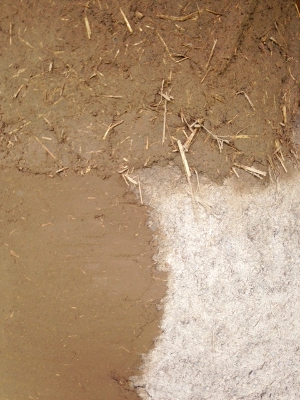
The process is just like making cob, except you need to sift the straw through the 1/4 inch sifter. The clay and sand should be sifted through the 1/8 inch screen. Once these steps are done, add water to the sand, clay, and straw and mix it up best you can. You know it is ready when you throw a wad of plaster at the oven and it sticks. That method is called harling. (You know you want to say it out loud…go ahead!)
We used trowels to get as smooth a finish as possible to the cob oven. With the extra plaster, Isabel (a student) began to sculpt some eyes; then some artistic rays beaming out from them. It sort of looked like an Owl. It kind of looked like Jaba the Hut. It somewhat resembled a nightmarish koi. It looked exactly like a PIZZA MONSTER!
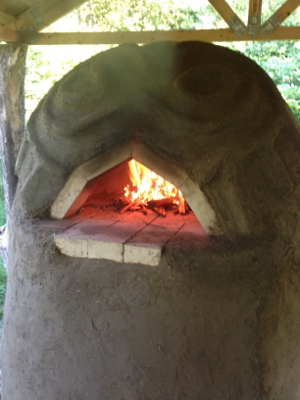
Our poor pizza monster had her mouth filled with sand for a whole week while the oven set. We helped her out on that seventh day by removing the sand and starting a small fire inside her mouth. She breathed fire like a dragon while the newspaper burned off the thermal layer. She is now ready to start pumping out the pizzas.
I want to thank everyone who had a hand in building this oven: Eli and Liam, Jason and Kerry and Kaia (pictured below), Vita, Jeremy, Ted, Haley, Isabel, Amanda, Eric, Marisha, Jamie, and Zack. Your cobbing is much appreciated!
By the way, a big part of why we love homesteading & permaculture skills so much is because they are a natural extension of learning about wilderness survival (both fields are all about self-sufficiency and working with nature to satisfy needs). An understanding of survival not only helps you become a better permaculturist, it empowers you with life-saving outdoor skills to keep you safe when out in nature. Right now you can get a free copy of our mini survival guide here, where you'll discover six key strategies for outdoor emergencies, plus often-overlooked survival tips.
Additional Resources on Cob Oven Construction:
Permaculture Courses at Alderleaf

About the Author: Steve Nicolini is an experienced permaculturist and wilderness skills instructor. He taught at Alderleaf for a number of years. Learn more about Steve Nicolini.
Return from Cob Oven Construction back to Permaculture Articles
Is The Essential Wilderness Survival Skills Course Right for You? Take the "Online Survival Training Readiness" Quiz
See for yourself if this eye-opening course is a good fit for you. It takes just a few minutes! Get your Survival Training Readiness Score Now!

Grow Your Outdoor Skills! Get monthly updates on new wilderness skills, upcoming courses, and special opportunities. Join the free Alderleaf eNews and as a welcome gift you'll get a copy of our Mini Survival Guide.

 The Six Keys to Survival: Get a free copy of our survival mini-guide and monthly tips!
Learn more